Table of Contents
Burn, Baby, Burn!
Quest Warlock is quickly emerging as the new terror of the meta. Most people, though, are concerned about the OTK version that power draws through its deck to end the game with massive damage from the quest reward. The problem with that deck, though, is that it's extremely difficult to play well consistently, and requires making a flurry of rapid decisions all while fighting the rope and animation delays. What if there was another way, where you could have the power and speed of that deck, but with more consistency?
Let me introduce you to Quest Handlock, friends! Instead of Stealer of Souls and Darkglare shenanigans, we're the Sir Mix a Lot of the meta - we like big butts and we cannot lie! Our goal is to cheat out huge minions (Flesh Giants, Anetharon, Goldshire Gnoll, and Barrens Scavenger), get a Battleground Battlemaster between them to give them windfury, and make the big noise when they hit your opponent in the face repeatedly. In fact, most of the time this deck doesn't even need to complete the quest to win most of the time; the quest stages are mainly there as extra triggers to discount your Flesh Giants and heal your face.

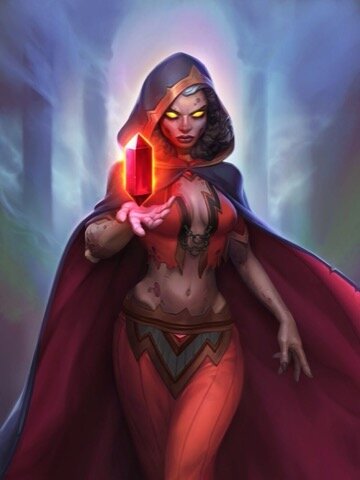
Can you spot the lethal?
This archetype borrows a lot of the cards from last meta's Delete Warlock that featured Neeru Fireblade as a win condition. Battleground Battlemaster is better, so we don't need Neeru anymore, but we do run the rest of the self mill package: Soul Rend is one of the best early anti aggro cards in the game, Barrens Scavenger is another big minion, and the late heals from Blood Shard Bristleback can swing games. In fact, the self mill payoff cards are so impactful that we even run Altar of Fire in this build. This isn't a common inclusion, but a player named Funashi got to high legend prior to the Il'gynoth balance patch, and in my testing I believe it's core to the deck. Getting down to 10 cards in deck is critical in some matchups, particularly against aggressive decks, to be able to switch on Barrens Scavenger to taunt and Blood Shard Bristleback to heal, but often you need a bit of help to get there if you don't hit Soul Rend on a big board and find early Backfires. Altar of Fire is easy to work into turns to be able to mill down to 10 on demand, and can occasionally hurt a combo deck or help mill down to fatigue in matchups where you do need quest completion to get over the line.
General Gameplay

Your priorities are, in order:
A) Don't die
B) Develop board
C) Progress the quest
Keep these priorities in mind at all stages of the game. If you have a choice between tempoing out a minion, or life tap to advance the quest, it's usually correct to play the minion. If you have a choice between a play that gets you out of lethal range or a play that completes a quest stage, get out of lethal range. The quest is almost never worth the risk in this deck. This will commonly present itself as a choice between using Blood Shard Bristleback purely to heal, or spending your mana elsewhere; even using Bristleback on your own minion is a reasonable play more often than you'd think.
You also want to be constantly aware of three things: Your deck size, your quest completion status, and your life total. Quest completion matters mainly in terms of Flesh Giant discounts and the lifesteal; a Raise Dead with three damage remaining is effectively free in terms of health. Also remember to factor in any completed stages when counting lethal; the three damage is easy to forget about, but it can get you over the line sometimes.
Other miscellaneous tips:
- Tour Guides are reasonable targets for Touch of the Nethrazim and Mortal Coil, especially if your opponent's minions are unlikely to line up cleanly.
- If you do complete the quest, remember than Tamsin herself is a 7/7 for Battlemaster purposes.
- Always position your highest attack minions together to maximize Battlemaster damage; if you have more than two, you want the highest attack in the center with the next biggest outside of them. Tour Guides should always be played on the far left or right.
Deck Code
AAECAcn1AgKE+wOH+wMOm80D184DwdEDk+QD2O0D6+0D8O0D8e0DiO8DxvkDx/kDg/sDsZ8E56AEAA==
Card Inclusions
Raise Dead
Obviously this is in the deck both to progress the quest and get more big minions. But don't forget that it also adds two cards to your hand for free and discounts your Flesh Giants by one mana. Starting your turn with Raise Dead, even if your pool isn't full of Giants already, can help you get an extra Anetharon or Goldshire Gnoll down if you order your turn properly.
Altar of Fire
Some tips on usage given that this is one of the hardest cards to time properly in the deck: You don't typically want to throw out Altar of Fire indiscriminately. Keep tabs on your deck size and evaluate if it will allow you to get down to ten cards this turn or next, and how you'll capitalize on that once you're there. If you burn all your payoff cards, the deck size doesn't matter. More simply, if you're at 11-13 cards (or 14 with mana available to hero power) and that will allow you to play a Blood Shard Bristleback or Barrens Scavenger that's already in your hand, burn, baby, burn.
Mortal Coil
Good for removing early minions, or to target your Tour Guides for additional draw.

The Demon Seed
It's the most broken card in the game, right?
Touch of the Nathrezim
Amazing anti-aggro and healing all in one.
Tour Guide
The ability to sneak in a hero power when you'd otherwise have to float mana can be incredibly powerful. Tour Guide also provides a target for Mortal Coil, Touch of the Nathrezim and Drain Soul for additional card draw or healing in matchups where your opponent doesn't play minions that line up with those cards cleanly.
Drain Soul
Excellent early removal and healing.
Unstable Shadow Blast
Amazing early removal. Quest progression is extremely secondary when Blasting minions in this deck.
Backfire
Quest progression and burst card draw all in one.
Blood Shard Bristleback
6 healing plus removal for 3 mana is one of the best deals in the game. Also keep in mind that the body itself has lifesteal as well, so if one sticks, you can use a Battlemaster to double up the healing from attacking.
Soul Rend
Easily the best early AoE spell in standard. In general, don't wait too long to milk value from it; you've got things to do. Once your opponent has more than one or two minions on board, use this for reset.
Anetheron
The misconception about Anetheron is that you need to hoard cards to get it on board for 1 mana. You honestly shouldn't need to try that hard to play Anetheron; usually just ordering your turn correctly (Raise Dead with 8 cards in hand, Backfire with 7 in hand) will allow you to sneak him in. You'll sometimes just get him back from Raise Dead with a full hand also. Plan for him and you'll be rewarded, but he's not worth passing a turn just to get him down later if you have a more proactive play that you could make instead. Also, playing him for full cost initially can help you get him back for the discounted cost from Raise Dead in some niche circumstances.
Barrens Scavenger
The other reason to burn our deck; the taunt protects our beautiful face, and the 6 damage can turn into 12 with Battlemaster.
Battleground Battlemaster
Double your damage, double your fun!
Flesh Giant
The reason the deck is so good, even after the nerf. Just prioritize your life total changes on your turns early to get them down ASAP.
Goldshire Gnoll
Both good for pressure and removal. With a full hand, this costs 1, but remember that coin doesn't help get this down earlier (because using coin decreases your hand size), and if you have both in hand, the second one will cost one more mana than the first one.
Notable Exclusions / Tech Choices
Turns out you only need one Tamsin in this deck.
Tamsin Roame
Tamsin can get you out of sticky situations every so often, but more often than not, you don't have the extra mana to be able to work her in. What's worse, she's awful from Raise Dead; you never want Tamsins in your pool over big minions you can use to end the game.
Bloodmage Thalnos
The spell damage doesn't matter often enough, and I'd rather just burn three cards than draw one. Plus, like Tamsin, this pollutes your Raise Dead pool.
Spice Bread Baker
If you're seeing a ton of aggro, this is a reasonable inclusion. With this list, though, you tend to get the Blood Shard Bristlebacks online quickly enough that any more healing in the deck feels redundant, especially since the meta slowed down post-nerf.
Entitled Customer
This is primarily a tech for the mirror; if you're seeing a lot of Giants on the other side of the board, you can consider running one copy of this, but if you don't need an AoE bigger than Soul Rend regularly, this can be too slow.
Mulligans
Always keep: Backfire, Tour Guide
Against aggro: Soul Rend, Drain Soul, Touch of the Nathrazim, Unstable Shadow Blast
Against slower decks: Anatheron, Goldshire Gnoll (both only on coin or with Backfire)
Your ideal curve is quest on 1, hero power on 2, Backfire, Coin, Tour Guide and hero power on 3, which completes stage 1 of the quest. If you don't have Backfire on 3 but you do have Tour Guide, and you don't need the 2 remaining mana to react to the board, tap before Tour Guide so that you have the free life tap on 4. Against any deck that goes wide, hard mulligan for Soul Rend; the only exception is Backfire, because Backfire gives you two net additional draws to find Soul Rend. Do not keep any other spot removals against aggro if you don't already have Soul Rend.
Matchups
Note: This is written two days post-nerf, so some matchup advice will draw on pre-nerf experience; I'll update this section as needed as the meta evolves.
Archetype names link to highlights of games against that deck from my stream.
Demon Hunter
Deathrattle DH - Unfavored
Dealing with multiple waves of minions in a turn is not exactly your forte. Try to line up a series of turns where you can remove half the minions with targeted removal or Soul Rend, then follow up with whatever you didn't use the turn before. If you still have Soul Rend available after the initial wave, save it for Blackthorn on 7.
Druid
Anacondra/Celestial Druid- Even
This is effectively a battle to scam the other first. If they get their Anacondra combo down before you can get your Giants down, there's not much you can do about it. If they don't find it, Soul Rend can chew through their Glowfly Swarms, and they can't easily react to your Giants if they don't already have a board, so you can get damage through before they can build up a gazillion armor.
Hunter
Face Hunter - Favored
Use your spot removal to deal with the early board (but make sure to get full healing value from cards like Touch of the Nethrazim and Drain Soul), ideally wiping with Soul Rend on 4 or 5. If you get an early Soul Rend, you should be able to get down to 10 cards and stabilize, and by that point they don't have enough damage to finish the job. As with Mage, prioritize keeping your life total high. Once you get past turn 5, use Gnolls for trading only and be sure you can kill off your Tour Guides immediately so that you don't give your opponent a clean opportunity to do damage with Trampling Rhino. (Giants, Anetheron and Scavengers are all reasonably safe to play into Rhino.)
Mage
Quest Mage- Unfavored
This improved since the nerf, but in general this matchup can rough because the quest mage can pressure your life total and they can freeze your minions repeatedly, plus they have access to Ice Barrier. You still want to play your game, developing board aggressively to force them to react; ideally, their face spells will hit your minions. Altar of Fire is good late even if you've passed the 10 card threshold to try to burn Ignites; if they don't draw them, they can't shuffle them. Prioritize keeping your life total as high as possible, even more so than usual; you're going to give them time to play Flow, and if they hit it they can burn you down from 20+ life post-quest without breaking a sweat. Pay attention to whether you need to pivot to quest completion to win; if so, do so while keeping your life total high; you may need to damage the Mage that way if they successfully stall and remove your minions.
Paladin
Handbuff/Secret Paladin - Unfavored
Even despite the Battlemaster and Conviction nerfs, this matchup is extremely difficult because they get on board very quickly, and divine shields get in the way of Soul Rend clears. Try to keep the board as clear as you can, and pick off divine shields ahead of a potential Soul Rend clear. Your goal is to get on board and keep them off it; once you have board control, Varian is one of the only ways they can get it back from you.
Priest
IMPORTANT: Do NOT complete the quest without being able to play Tamsin on the same turn. Control Priest plays Mutanus and both Priest archetypes play Mindrender Illucia; if you've gotten to the point where you've progressed the quest enough to complete it, you probably need it to win, and you don't want to give it over to the Priest for free.
Shadow Priest - Favored
Soul Rend is the key to this matchup. You want to clear their first board and then you should be able to pick off the next wave of minions and outclass them on board after that. As soon as Shadow Priest is forced to trade rather than hit your face, you've won. Remember that Dragonmaw Overseer and Wriggling Horror can push minions out of Soul Rend range, so don't get too greedy with it. Also remember that Voidtouched Attendant makes all your self damage effects hurt you for +1 (but also make your quest completions deal 4 lifesteal damage); this can be either a blessing or a curse depending on the situation, but you don't want to be surprised by it.
Control/Quest Priest - Favored
This is one of the few matchups where you play for quest completion. You have inevitability on your side and if it comes down to racing quests, yours comes down faster. Just speed run the quest and then finish them off with fatigue damage.
Rogue
Quest Rogue - Favored
You'll want to time Soul Rend properly to hit a board of stealth minions, but this is ultimately a battle for the board. Your big minions come down before theirs do, and you should be able to answer Assassins with Raise Dead to make more minions. If you drop multiple big minions on the board at once, the Rogue usually has no way to answer all of it, since their removal is all targeted.
Weapon Rogue - Unfavored
The big problem with this matchup is that you don't get taunts online until you've burned through most of your deck. You want to get your big minions online ASAP to try to create counter-pressure and then get down to 10 cards to be able to get your Barrens Scavengers in the way. Feel free to Altar aggressively; they draw faster than you do, so burning cards can deprive them of resources they need to get over the line.
Shaman
Quest Shaman - Favored
Quest Shaman gives you time, so use that to your advantage. Soul Rend clears most of their pre-quest boards. Be prepared for your minions to get devolved or Hexed; you can't really do anything about it because those are usually generated, but be aware of what you're putting into your Raise Dead pool when that happens.
Elemental Shaman - Unfavored
The gameplan is the same as for Hunter, except that if they have Doomhammer you're going to have a very rough time; your only taunts are Barrens Scavengers, which come on line too late. You want to Soul Rend any Arid Stormer boards ASAP, because if they follow up with Whack-a-Gnoll Hammer, the Stormer will be out of range of Soul Rend, and things tend to snowball from there.
Warlock
Quest D6 - Unfavored
Your goal here is to make them spend their early turns addressing your board so they can't just play slow cards like Free Admission and Mythril Rod without risking punishment. It's much easier said than done, though.
Quest Handlock - Even
You just want your Giants first. That's basically all that matters. Do what you need to do to get the first big board; there isn't any clean answer to a board of 8/8s, and if you can connect even without Battlemaster, that should turn off enough of the opponent's deck to be able to finish the job the following turn.
Warrior
I'll update this section once I see one.
Playing Against This Deck
Recognize that you're fighting for board; this version of the deck usually doesn't kill you with the quest, but rather with high attack minions that stick to the board past turn 6. If you can get board early and keep it, you can prevent the Handlock from developing its threats to end the game. Any sort of transform effects are also extremely effective against this deck, because that reduces Raise Dead value over the course of the game. Also consider minion health breakpoints - 1 health for Mortal Coil (draw), 2/3 health for Touch and Drain Soul (healing), 5 health for Soul Rend and 6 health for Unstable Shadow Blast and Blood Shard Bristleback. Anything above 6 health will likely require two cards to remove, which could delay their development. If your deck naturally wants to go face anyway, lean into that; the big healing doesn't come online until the Warlock is below 10 cards, so if you can force them to go down low enough in life to be able to finish them off before they can recover with the self mill cards.
Conclusion
Thanks for reading! If you enjoy this content, please follow me on Twitter and subscribe to my podcast, Off Curve. I also stream on Twitch, so please follow there as well!